Best Beginner Welder
How to start welding
Best starter welder
This section of our welding for beginners course covers best beginner welder training steps, to teach you how to start welding as quickly as possible. To help get you to fully understand the welding principals, before you start practising the physical welding exercises.
Best Beginner Welder
In another section on this welding classes course, we explain the best beginner welder, as in, the best choice of welder to get you started to become a proficient welder.
Best Beginner Welder
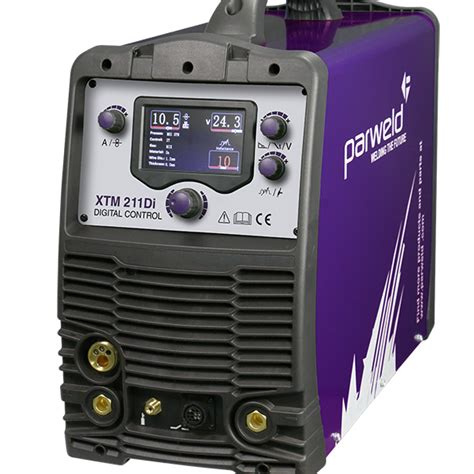
This is the top of the range portable welding machine. Parweld supply a large range of different welding machines, to suite everyone's needs.
The welding machine above is rather interesting in that, it offers 4-in-1 facilities. MIG, TIG a/c, TIG d/c and Arc welding, all from 1 welding machine.
You can weld:
MIG mild steel welding, using argo shield gas.
MIG stainless steel welding, using pure argon gas.
MIG aluminium welding, using pure argon gas.
(This is covered in our MIG aluminum welding course, where we show how you can MIG weld aluminium, without the use of a spool gun)
d/c TIG mild steel welding, TIG brazing and TIG stainless steel welding.
a/c TIG aluminum welding.
Plus Arc welding, and Arc pulse welding.
All these porocesses available, using the same welding machine but, you would need 2 separate argon gas bottles.
This is an amazing welding machine and classed as a mobile portable welding machine, which it is, but a little on the heavy side to lug around on a daily basis.
We will be demonstrating using this amazing Parweld XTM 211Di, 4 in 1 Multi-Process Inverter welding machine.
Parweld have over 60 distributors all over the world, selling a large variety of welding machines and all the accessories to go with all their welding machines.
We bought our Parweld XTM 211Di 4 in 1 Multi-Process Inverter welding machine from Chris Hobbs:
Chris has a very succesful welding supply company based in west London. You will have to go a long way to find better prices for welding equipment.
Chris sells and ships his welding equipment to all over the United Kingdom, because of his good prices. CMH Welding Supplies Ltd.
2 Tithe Close
Hayes
Middlesex
UB40YN
London
CMHwelding.com
CMHwelding@blueyounder.co.uk
Tel: 0208 5812 849
Mob:0777 6197 493
Cheapest Welding Machine
Best Cheapest Welder
Cheapest Welder
This must be the cheapest welder available. If you are looking around for welding machines to buy, this would be the cheapest welding machine option, if you wanted to use it's full potential. That's if you wanted to use all the welding facilities of MIG, TIG ac, TIG dc and Arc welding. To buy all the machine seperately would be a lot more expensive. This would be the best cheapest welder choice.
Best beginner welder guidelines to help you understand every step on, how to start welding.
We only refer to portable welding machines in this course, because our profession is mobile welding. However, the welding principals taught, are all exactly the same for any size welding machines. |
What size welding machine to choose.
We choose to use 200 amp welding machines for our needs and purpose as mobile welders in and around London.
It's best to choose a higher capacity welding machine for what you set out to weld.
Our average welding amperage is around 115 - 125 amps, mostly using 3.2mm welding rods.
This means we not putting a strain on our welding equipment running at 2 thirds of the capacity of our welding machines.
Preparation, before starting to weld:
Cleaning up your workpiece before starting your weld.
Flapper sanding discs are really handy to have.
From 40 grit to 180 grit for polishing.
We show in more detail in our stainless steel welding
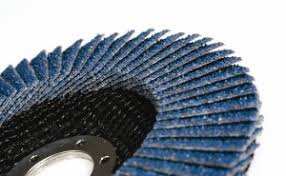
course, how to grind and polish welded surfaces so that the weld is not visible at all. With different finishes like brushed steel finish and really shiny polished finishes.
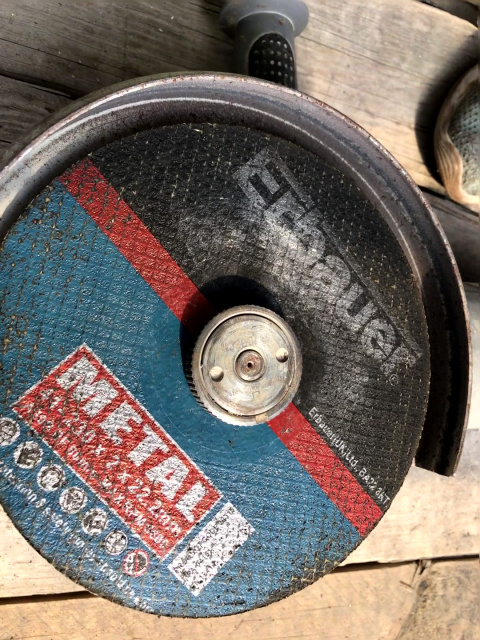
Here is an angle grinder with a handy quick release lock-nut which you can quicly release by twisting the lock-nut by hand. Very useful.
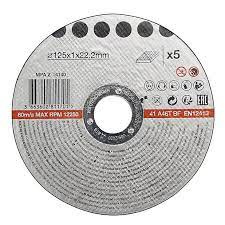
Below showning a cutting disc, and grinding disc. We find a 5" (125mm diametre discs) to be far more practical and useful compared to the 115mm - 4.5".
You could use an angle
grinder with either a wire brush, grind stone or flapper sanding disc to clean up welding surfaces.
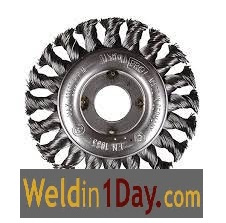
There are a variety of different wire brush designs to choose from to suite your needs.
We prefer the one shown here. The cup type are difficult to screw off and the wire strands tend to shoot out and quite dangerous.
Welding rusted steel.
This is not advisable because the welding does not flow or penetrate the rust. The welding just bubbles and creates a horrible mess.
But, if you have no option.
Preparation is vital. Use a hammer to beat the material in order to dislodge as much of the rust particles as possible. If you can get in with an angle grinder that would help a lot.
Welding on a rusted surface after preparation will eventually settle down, but you have to make a few welding passes to get rid of any imperfections in your welds and will eventually get up to full strength.
Choosing which welding gloves to use?
Welding Gloves
Best Welding Gloves
Tillman Welding Gloves
Best MIG Welding Gloves
Best Stick Welding Gloves
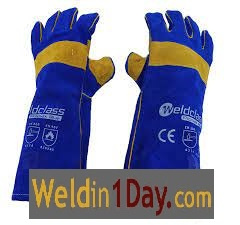
Now, when it comes to choosing welding gloves, our preference is to use TIG welding gloves. They are far thinner and WILL NOT offer anywhere near the same heat resistance when it come to picking up or working with hot materials. But, they offer protection again sparks and a certain amount of heat resistance which is perfect in our judgement.
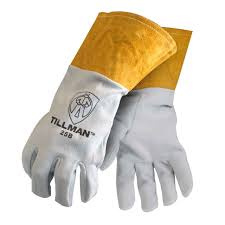
You get really thick, chunky leather gloves, then medium thickness leather gloves. The TIG leather welding gloves are made from thin leather, but the advantage is you have a far better feel and control while welding.
Ulimately, your choice.
We offer the best starter welder guidelines to help you how to start welding in the shortest possible timeframe.
We have put in an enormous amount of time and effort into this welder training course to make it the best beginner welder course available.
On the subject of welding gloves again.
Working with thin welding gloves gives you the added advantage to be able to feel, and control your welding actions as precisely as possible.
Try painting using really thick gloves on. You won't have much control at all. It's pretty much the same as welding.
This welding presentation can be viewed on YouTube from any of the live links on this page.

How to achieve really good looking welds:
The more controled, precise and accurate your movements are while welding, the better your welding results will turn out.
It is so satisfying, when you achieve a really good looking weld. And just as satisfying when the flux just drops off when you are Arc welding, as shown in the photo.

You don't get any flux coming off your welds when using an Argon gas MIG welder.
You do get flux chipping off when using gass-less MIG welding called flux core MIG welding, but we do not cover this, because we do not recommend it.
Best starter welder, tips and tricks.
Arc welding.
Arc welding is slightly more difficult to master compared to MIG welding but Arc welding certainly has it's advantages over MIG welding from time to time.
Make sure to buy an inverter technology welding machine from your local welding supplier. The better quality your welding machine, the easier it will be to learn how to weld.
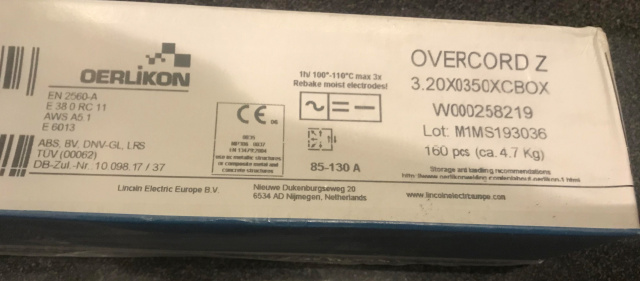
Set yourself up in your workshop. Make sure to buy some 6013, muti positional welding rods. Important!
These are the best biginner welder guidelines to get you started quickly.
These are the welding rods we us in the United Kingdom.
Go to your welding supplier, or on-line, and ask for the following welding rods.
Oerlikon. Overcord Z. 6013. 3.2mm diametre.
These are the best starter welder welding rods.
If your supplier does not have these exact same welding rods in stock, then ask them for the the same equivalent made by a different company. Make sure to ask for muti positional welding rods. Get the top of the range rods, especially to get you started.
You get a range of welding rod sizes from 1.6mm, 2.5mm, 3.2mm. 4mm and still more, but this is the range of welding rods we work with using our 200 amp Arc welding machines.
The thinner the material to be welded, the smaller the diametre of the welding rod needs to be. The smaller the rod, the lower the amps required, the less heat input, the less likelyhood of burning holes in your material.
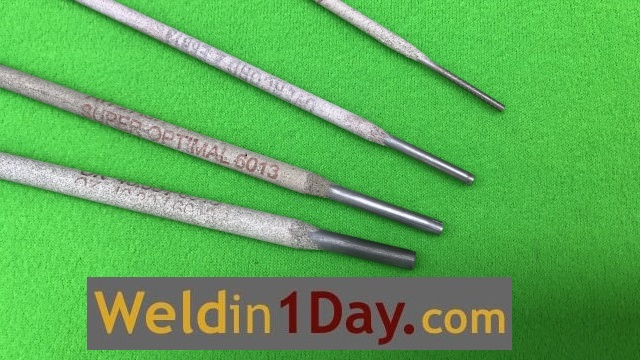
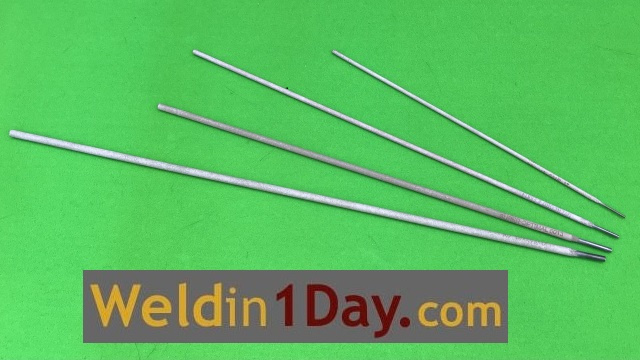
The Oerlikon welding rods are a little pricey, but well worth it. Especially to get all the welding for beginners started.
Once you become a more proficient welder, you can then look at buying cheaper welding rods later which are just as effective. But, don't buy any cheap welding rods.
We will guide you in one of our other welding classes sections as to which of the cheaper welding rods to buy.
Oelikon are a French company so their welding rods should be available in many different countries. There are other welding rod manufacturers who produce welding rods just as good so no need to stick with one brand of welding rods.
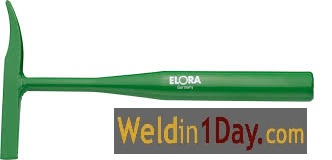
This specific chipping hammer is really useful having the curved tip on the end to get into tight places when chipping away the flux coating.
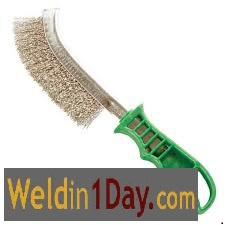
We suggest getting a stainless steel wire bush. It works and lasts a lot longer.
It is always good practice to clean up your material to be welded first. That will always help give you better results.
WARNING:
Welding is addictive,
once you master the art


The clarity of our videos are a great help to be able to explain and see every move without overexposed filming footage.
We also go into detail in our advanced welding courses, showing the effects of different angles of the welding rod, or MIG welding torch angle.
Best Beginner Welder Guide
MIG Welding for Beginners
MIG Welding
Refer to, Setting up a MIG welder, before starting your MIG welding.
Argon Gas flow rate settings:
Once your MIG welder is set and ready to go, Argon gas switched on, 8-9 litres per minute set on the regulator for portable welding machines and 12-13 litres per minute flow rate on bigger industrial MIG welding machines.
Practice straight welding runs first.
Have a plate of say 6mm (1/4") metal ready to practice straight runs on to get the feel of the welding action.
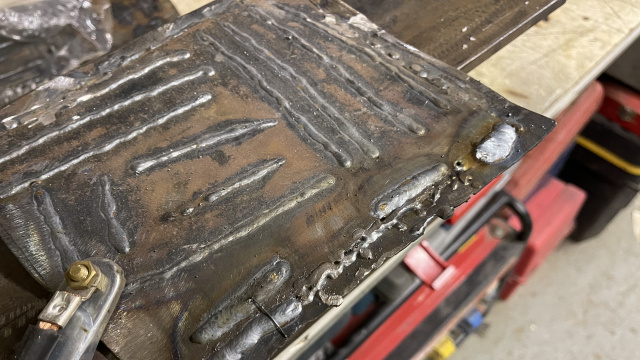
Hold the MIG torch 6 - 13mm (1/4” - 1/2") away from the work piece. That's the distance from the bottom of the MIG welding Gas Shroud to the surface being welded.
Always look at where you are welding from the side, so you can judge the distance away while keeping an eye on the welding puddle at all times.
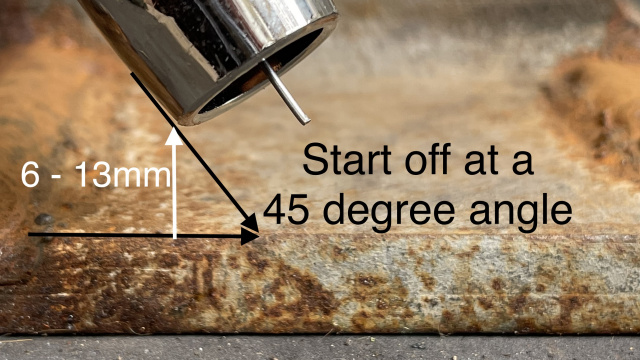
The MIG torch needs to be angled around a 45 degree angle to the work piece to start with.
If you look at the torch from directly behind, you won't be able to see and judge the distance from the welding puddle. Look from the side.
This applies to arc welding too.
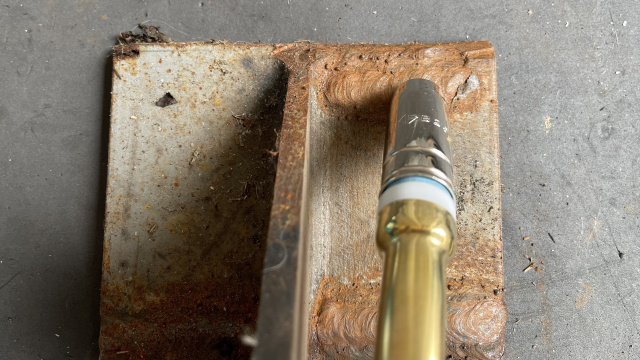
The next image shows the Argon gas flow shielding the welding puddle from oxidation. Preventing oxygen from entering into the welding area which will cause perforation in the weld.

It is very important to maintain the 6 - 13mm (1/4” - 1/2”) distance away from the weld puddle. As soon as you raise the torch too high you will cause oxidation in your welds.
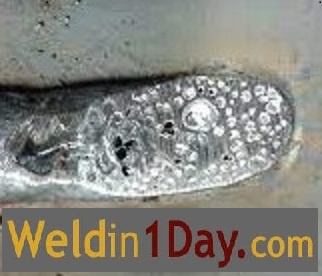
This is the result of oxidation where oxygen has entered into the welding puddle causing perforation. It causes the molten metal to bubble leaving small holes in the weld.
The photo below was prepared by grinding off the top of the weld showing what is going on inside. This would obviously fail a welding inspection because it has been considerably weakened.
This weld would need to be completely ground, cut out and re-welded.
Once you become more proficient at welding we will teach you techniques using different angles and the effects and reasons behind the techniques.
How to start welding.
Once everything is setup you are ready to start your first weld.
The most common practice when MIG welding is to do push welding. That is. Holding the torch at an approximate angle of 45 degrees, and pushing the torch along while welding. That’s called push welding.
We go into far more detail later on in the welding course about push and pull welding, and when best to apply it.
Hold the torch at the correct angle and distance away from the surface to be welded and press the torch trigger to start the welding process.
Keep a close eye on the welding puddle and don’t advance too fast, or too slow. Weave from left to right about, 6mm (1/4”), keeping your motions as uniform and steady as possible.
Practice straight line welds until you start getting the feel of the welding flow.
Arc Welding for Beginners
Best starter welder
Arc welding could be regarded as the best starter welder, in that it’s cheap to buy, welds in any condition. Relatively easy to master. Really easy to get started with setting it up.
Plug it in, clip a welding rod in the holder and off you go.
Once you can arc weld, MIG welding will be really easy for you.
Which angle to place the welding rod, in the welding rod holder.
Clip the Arc welding rod in the welding holder at the 45 degree angle as shown. Notice the welding rod holder has a variety of different angles to choose from for the welding rod.
This is really handy when you need to get into difficult access areas. This is where Arc welding has the distinct advantage over a MIG welding torch, which only has one angle setting.
Start off, by placing the welding rod in the 45 degree angle, in the welding rod holder. We recommend using a 6013 x 3.2mm diameter welding rod, as explained earlier.
Welding angle of the welding rod, in relation to the workpiece you are about to start welding.
It is always important to have the angle of the welding rod correct, and facing in the direction of the weld.
You need to start off with the welding rod at a 45 degree angle to the workpiece.
Starting, and continueing the Arc welding process.
Have a steel plate ready, around 6mm (1/4”) or more in thickness, to practice welding straight lines on.
Make sure to have your earth cable connected onto the plate somewhere. Your earth should be connected onto the + outlet on your Arc welding machine. (Unless otherwise stated on the welding rod box from the manufacturers)
Set your Arc welder on 120 amp setting, using a 3.2mm diameter 6013 welding rod.
Welding helmets.
We recommend using a welding helmet with an electronic auto dimmer facility. Your welding supplier should have advised you as to which helmet to purchase.
Now you need to close your welding helmet over your head to then look through the lense at what you are about to start welding.
We like to think this is the best starter welder course you will find. The most indepth, detailed and comprehensive welding classes course out there.

How to start welding.
How to start welding, and initiate the welding arc.
This explanation is aimed at arc welding because MIG welding is a lot easier, in that, all you need to do with a MIG welder is to hold your MIG torch about 6 - 13mm (1/4” - 1/2') away from the workpiece to be welded, and squeeze the trigger, then you're off.
Arc welding.
Arc welding requires a bit of a feel to get the arc started. Scrape the end of the welding rod across the surface to be welded. As soon as the arc ignites, hold the welding rod 3 - 6mm (1/8" - 1/4" inches) away from the surface. Remember the welding rod is being consumed. It is melting away so you need to compensate for the welding rod getting shorter all the time.
Not like MIG welding where the welding torch has the welding wire fead through the torch, so no need to compensate like arc welding.
More in-depth MIG and Arc, best beginner welder explanations to follow in another section of this course.
Showing how to make your welds stronger than the material itself.

Discover all the information needed to become a
proficient welder in our Weldin1Day course.
Introductory price offer for only $297 US
That's 50% off the original price.
We had our minds set on $594 for the long months
of hard work structuring this valuable
and useful information together.
Price increase to $594
once the offer is over.
You are welcome to leave your details to contact you
once the course is completed.
Here is some free information to get you started:
1. Weld in 1 Day introduction.
2. Arc Eys - H&S
3. Stick welding vs Mig welding
4. Welder Shielding Gas
5. Best Beginner Welder + Preparation
6. Best Welders for Beginners
7. MIG and Arc Setup
Cracked motorcycle crankcase repairs
Welding course material.
8. Weave straight line welding.
9. How to MIG weld successfully.
10. How to Arc weld successfully.
11. How to vertical up weld. MIG & Arc.

Weld in 1 Day™ Weld in 1 Day©
|
 To enhance your user experience on our website, this site uses cookies.
If you continue to browse, you accept the use of cookies on our site.
See our Privacy Policy
for more information.