|
Here is some free information to get you started:
1. Weld in 1 Day introduction.
2. Arc Eys - H&S
3. Stick welding vs Mig welding
4. Welder Shielding Gas
5. Best Beginner Welder + Preparation
6. Best Welders for Beginners
7. MIG and Arc Setup
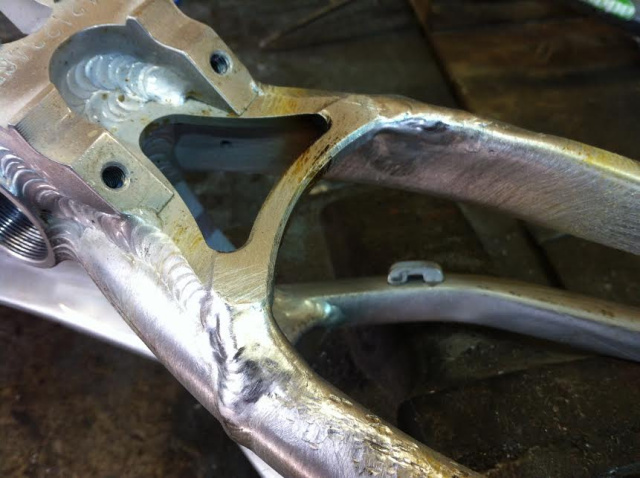
Cracked motorcycle crankcase repairs
Welding course material.
8. Weave straight line welding.
9. How to MIG weld successfully.
10. How to Arc weld successfully.
11. How to vertical up weld. MIG & Arc.
MIG welding settings
MIG welder settings
MIG welding setup
The MIG welder settings take a bit of time to set up but, once it's set, then it's plain sailing after that. MIG welding settings are easily identified by just listening to the crackling sound.
You will be able to get the hang of the MIG welding setup in a very short space of time.
What we suggest, once you are happy with your specific MIG welder settings, is make a note somewhere, to be able to refer back to the MIG welder settings at a later stage.
What we mean is the ratio settings between the wire feed rate and the amperage settings.
You might end up with 4 different MIG welding settings say for 2-4mm steel thickness, then 5-8mm, 9-13mm and 13-19mm.
It will then be easy to refer back to at any time to change the MIG welding setup.
The easier option is to buy a modern MIG welding machine.
Modern MIG welding machines have a built-in, automatic MIG welder settings facility, where it changes the MIG welding settings for you.
All you do is dial in the thickness of the material you want to weld and the MIG welding machine automatically sets up the ratio for you. You can still however over-ride the settings to still change it to you liking.
It's about getting the ratio of the MIG welder settings in sync between the wire feed speed, and the amperage settings.
Here is a 4-in-1 multipurpose welding machine we bought, to demonstrate all the facilities capable from 1 machine.
Fantastic piece of kit.
This machine comes complete with all the attachments and cables, other than a foot control pedal.
But, the welding torch has buttons on it to increase/decrease the amperage while you are working.
Works the same as a foot control pedal.
This is the top of the range portable welding machine. Parweld supply a large range of different welding machines, to suite everyone's needs.
The welding machine above is rather interesting in that, it offers 4-in-1 facilities. MIG, TIG a/c, TIG d/c and Arc welding, all from 1 welding machine.
You can weld:
* MIG mild steel welding, using argo shield gas.
* MIG stainless steel welding, using pure argon gas.
* MIG aluminum welding, using pure argon gas.
(Covered in our MIG aluminum welding course, where we show how you can MIG weld aluminium, without the use of a spool gun)
* TIG mild steel welding. TIG brazing. TIG stainless steel welding.
* a/c TIG aluminum welding.
* Plus Arc welding, and Arc pulse welding.
All these porocesses available, using the same welding machine but, you would need 2 separate argon gas bottles.
Cheapest Welding Machine
Best Cheapest Welder
Cheapest Welder
This must be the cheapest welder available. If you are looking around for welding machines to buy, this would be the cheapest welding machine option, if you wanted to use it's full potential. That's if you wanted to use all the welding facilities of MIG, TIG ac, TIG dc and Arc welding. To buy all the machines seperately would be a lot more expensive. This would be the best cheapest welder choice.
This is an amazing welding machine and classed as a mobile portable welding machine, which it is, but a little on the heavy side to lug around on a daily bassis if you are a mobile welder.
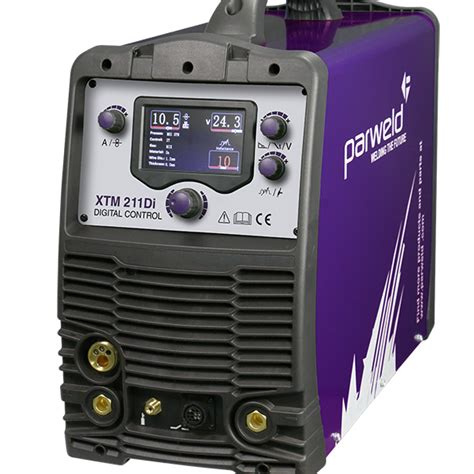
We will be demonstrating using this amazing Parweld XTM 211Di, 4 in 1 Multi-Process Inverter welding machine.
Parweld have over 60 distributors all over the world selling a large variety of welding machines and all the accessories to go with all their welding machines.
We bought our Parweld XTM 211Di 4 in 1 Multi-Process Inverter welding machine from Chris Hobbs:
Chris has a very succesful welding supply company based in west London. You will have to go a long way to find better prices for welding equipment.
Chris sells and ships his welding equipment to all over the United Kingdom, because of his good prices.
CMH Welding Supplies Ltd.
2 Tithe Close
Hayes
Middlesex
UB40YN
London
CMHwelding.com
CMHwelding@blueyounder.co.uk
Tel: 0208 5812 849
Mob:0777 6197 493
Let's get you started with your MIG welding setup, by showing you the MIG welder settings first.
Check: All three need to be the same diameter.
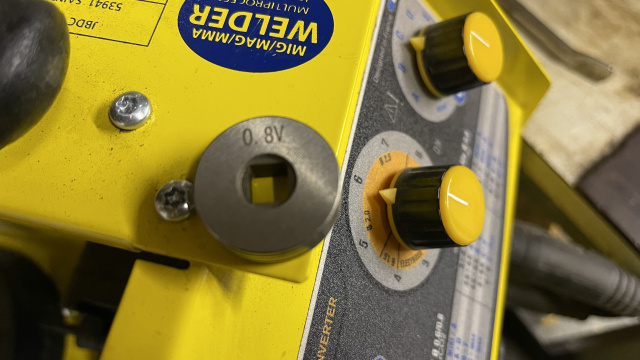
1. MIG wire diameter.
2. MIG wire drive wheel groove.
3. MIG torch tip.
Check to see if your MIG welding wire diameter corresponds with the grooves on the MIG wire drive wheels, plus the MIG torch tip needs to be the same size too. So, if you are using 0.8mm wire, then the drive wheels need to be 0.8mm, written on the wire feed drive wheel, then check to see if you have a 0.8mm tip installed in the MIG welding torch.
If you change the MIG welding wire diamter, then all three need to correspond with each other.
How to install a real of MIG wire in your MIG welder:
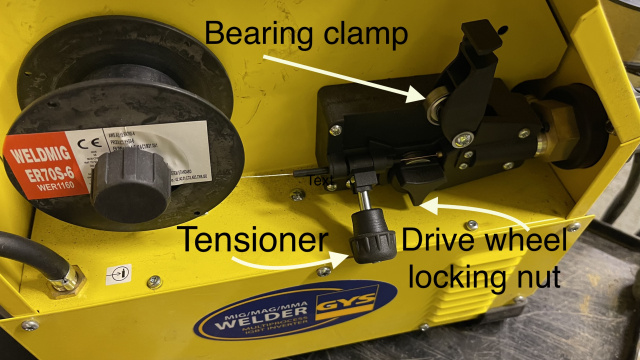
When opening up the wire feeder, just pull the Tensioner towards you. It is designed to clip out, releasing the bearing clamp.
Make sure not the change the Tensioner settings. In fact, take note of the setting first before releasing it. The Tensioner is calibrated, so observe the number of the setting encase it gets moved in the process.
If you need to change the drive wheel, simply unscrew the drive wheel lock nut and pull the drive wheel off. The wheel can be rotated to use the opposite side groove, or replace it with a different size groove wheel.
Good tip to save on MIG wire wastage:
When you change over a wire real, clip off the end of the wire as it comes out of the torch. Then release the tensioner on the wire drive mechanism. Rotate the wire real to pull the wire back, out of the torch loom and onto the the wire real. Use one hand to wind up the wire while using the other hand to run the wire through your fingers to catch the wire as it comes out.
Once you have the end of the wire, carefully thread it through the hole provided on the wire real and bend the end over to prevent it from coming out.
DO NOT let go the end of the wire.

Installation of new MIG welding wire real
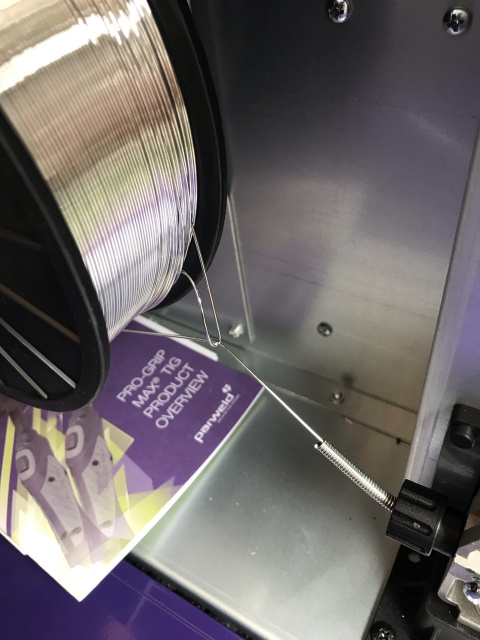
Notice the end of the welding wire has been fed through the hole provided in the real for storage purposses.
When you have installed the real in position, hold the wire before removing it out of the hole. Making sure not to let go the wire. Have a pair of side cutters/wire cutters ready. Cut the end of the welding wire off on a section which is nice and straight.
DO NOT let go the end of the wire!
Make sure not to let go the end of the MIG welding wire when you unclip the end from the hole in the real. You might find the wire will end up unravelling, creating a big mess. The overlapping will cause snagging when it starts feeding as soon as you start MIG welding.
Restricting the wire feed rate, or stop feeding altogether.
Example shown:
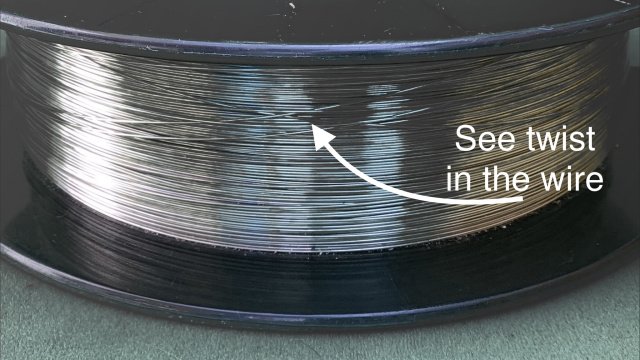
Here is a good example of what happens when the wire is caught up and snags.
You need to cut the wire and re-thread it again.
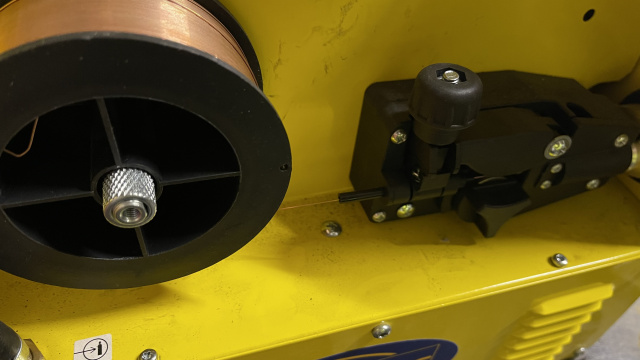
This shows the wire tensioner pulled down, releasing the bearing. Lifted up and out the way. Making space to install the new MIG welding wire.
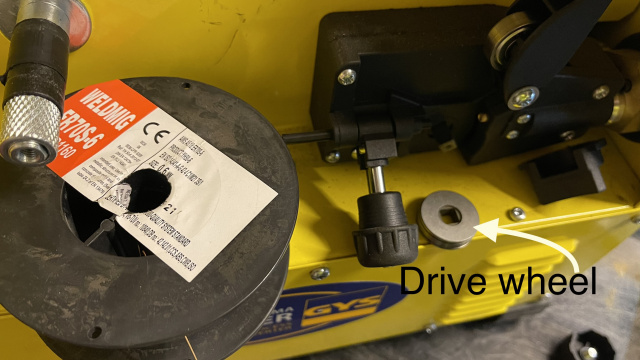
Note the wire drive wheel is marked with the size of the groove to accommodate the size of wire to be used. There should be 2 different size groves on each wheel.
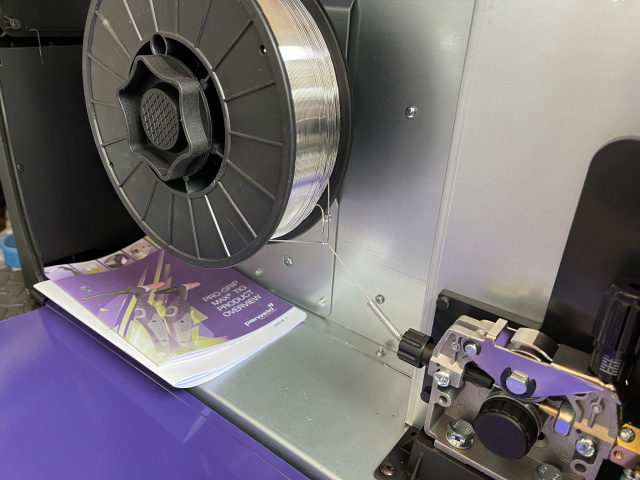
Install the real of MIG wire into the machine with the end of the wire pointing towards the feeder rollers. (The wire normally feeds off at the bottom of the MIG wire real, pointing to the right towards the drive wheel)
Make sure before you start, to release the wire tensoner clamp.
Carefully thread the end of the MIG wire over the feed roler and into the wire feed tube leading into the MIG torch loom.
Make sure to double check the correct groove on the drive wheel, corresponds with the alignment of where the wire is fed through.
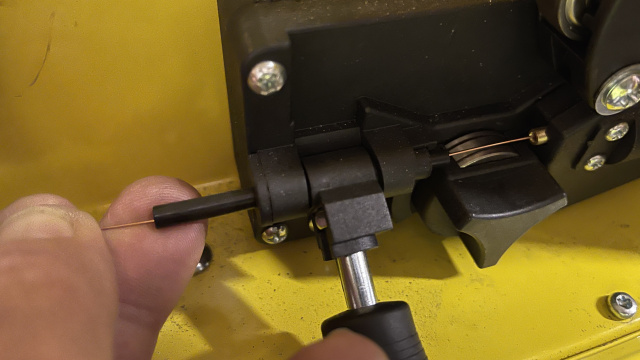
Then clamp the wire tensioner onto the MIG wire, holding it in place onto the drive wheel.
Once clamped in place, simply pull the triggar of the MIG torch and wait for the wire to be fed through the MIG torch.
Switch off as soon as the wire comes out the torch tip.
Cut the excess MIG wire off right next to the torch tip.
You are then ready to start welding.
Set the wire tensioner to around 3-4 setting. You don't want the tensioner too loose, otherwise the slightest restriction and the drive wheel will slip. Not too tight because if there is too much restriction, you want the drive wheels to slip, to act like a clutch as not to end up with the wire bending out away from the feeder tube and starts creating a nest of bundled up MIG welding wire inside the machine.
If that does happen, you need to cut the wire off shortly after the feeder drive wheel, pull the excess wire out of the welding torch loom, and feed in the MIG welding wire back into the guide tube.
Make sure when you are welding not to bend the welding loom too tight, which will restrict the MIG wire feed running inside it, causing it to snag.
Aluminum Spool Gun
Welding without an Aluminum spool gun
This snagging tends to happen a lot when you are aluminum MIG welding without a spool gun, because the aluminum MIG welding wire is very soft, and trying to push it tends to bend the aluminum wire and cakes up inside the machine.
A spool gun is a device mounted on the MIG torch and used to pull the aluminium wire through instead of pushing it.
However, in our MIG aluminum welding course, we show you how to successfully MIG weld aluminum without the use of a spool gun.
MIG welder gas settings
Argon gas flow rates should be around 8 litres per minute for portable MIG welding machines. You might consider going up to 9 litres per minute.
For heavier duty MIG welding machines, go up to 12 litres per minute.
When working in windy conditions, increase the gas flow.
Try and avoid MIG welding in windy conditions.
Not recommended.
Pure Argon gas to weld non ferous metals.
Argo shield, mixed argon gas for MIG mild steel, ferrous metal welding.
How to setup for Arc welding
Arc welding is a lot simpler to get yourself setup.
Connect the earth cable onto the + positive outlet socket on the Arc welding machine, unless otherwise stipulated on the welding rod packaging.
Clip the welding rod in the welding rod holder at the 45 degree angle setting to start with. Connect the earth clamp anywhere on the workpiece. Making sure you have all your PPE on. (Personal Protective Equipment)
Set the Arc welder to 120 amp setting if you are using a 3.2mm Arc welding rod. There is normally an amperage setting guide on the welding rod box to guide you.
Scrape the tip of the welding rod on a sheet of steel to initiate the welding spark to get started. Then hover the welding rod at about 3-6mm (1/8"-1/4" inch) above the surface.

Discover all the information needed to become a
proficient welder in our Weldin1Day course.
Introductory price offer for only $297 US
That's 50% off the original price.
We had our minds set on $594 for the long months
of hard work structuring this valuable
and useful information together.
Price increase to $594
once the offer is over.
You are welcome to leave your details to contact you
once the course is completed.

Coming Soon!

Video welding course material still under construction.
Here is some free information to get you started:
1. Weld in 1 Day introduction.
2. Arc Eys - H&S
3. Stick welding vs Mig welding
4. Welder Shielding Gas
5. Best Beginner Welder + Preparation
6. Best Welders for Beginners
7. MIG and Arc Setup
Cracked motorcycle crankcase repairs
Welding course material.
8. Weave straight line welding.
9. How to MIG weld successfully.
10. How to Arc weld successfully.
11. How to vertical up weld. MIG & Arc.

Weld in 1 Day™ Weld in 1 Day©
|
 To enhance your user experience on our website, this site uses cookies.
If you continue to browse, you accept the use of cookies on our site.
See our Privacy Policy
for more information.
To enhance your user experience on our website, this site uses cookies.
If you continue to browse, you accept the use of cookies on our site.
See our Privacy Policy
for more information.