|
Welding for Beginners HD Video
Welding Classes.
Learn to Weld
is a lot easier than you might think,
especially if you are shown and guided
every step of the way

Weld in 1 Day™ Weld in 1 Day©
Here is some free information to get you started:
1. Weld in 1 Day introduction.
2. Arc Eys - H&S
3. Stick welding vs Mig welding
4. Welder Shielding Gas
5. Best Beginner Welder + Preparation
6. Best Welders for Beginners
7. MIG and Arc Setup
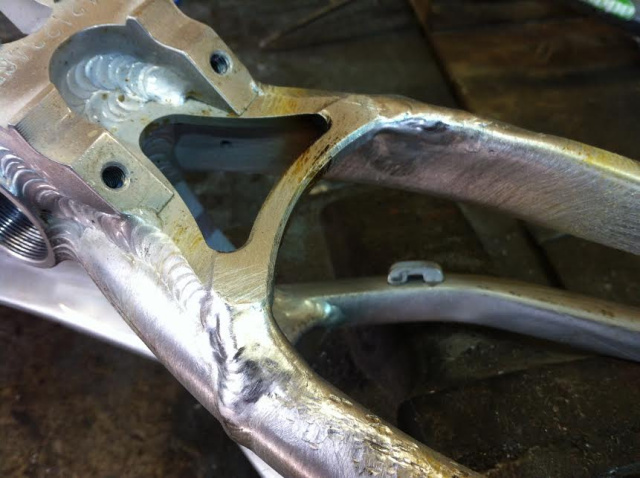
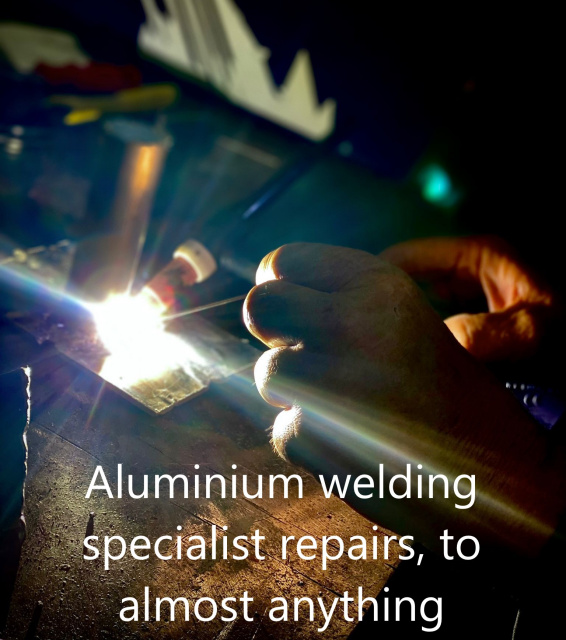
Cracked motorcycle crankcase repairs
We assume you have already gone through all the information shown above, which forms part of this welding course.
If not, we suggest starting at the beginning and go through all the information before continuing.
Welding course material.
8. Weave straight line welding.
9. How to MIG weld Successfully.
10. How to Arc weld Successfully.
11. How to vertical up weld. MIG & Arc.
How to Arc Weld Successfully
In order to achieve the exact same results as
shown in our videos. Just follow every step
in our welding courses, and you WILL
achieve the exact same results!
Strong and perfect looking welds
ARC welding is reffered to in different ways:
ARC welding - Stick welding - MMA welding.
When using an Arc welder, it is important to choose the correct size welding rod and amperage setting for the appropriate work to be welded. Knowing what the minimum and maximum rating of each welding rod is and what welding rods to use for the application.
The thinner the material to be welded, the smaller the welding rod diameter needs to be. The smaller the welding rod diameter, the lower the amperage setting, the lower the heat intensity will be subjected on the material and less likehood in burning holes in your work piece.
Arc welding is very quick and easy to setup and get started.
Choosing the correct welding rod for the application.
Also knowing which lead to use as the positive or negative
connection. Normal setting is (+) for the earth cable.
This can normally be found on the welding rod packaging.

It is advisable to choose an inverter technology welding
machine if you don’t have one already. Far smoother weld.
Far smaller and lighter if you choose a portable welding
machine too.

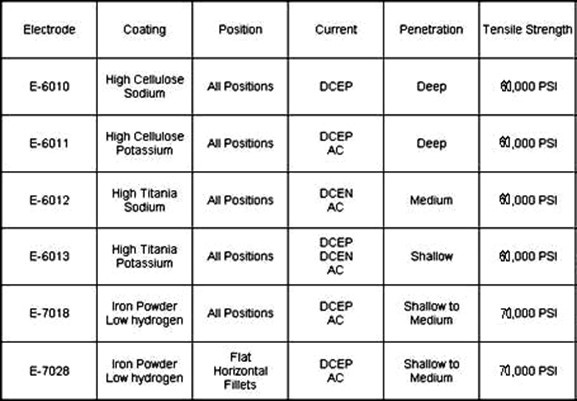
Next chart shows a list of Arc welding rods to choose from.
We recommend starting off with the E-6013. 6013 rods
are really easy to use. Plus, the advantage of bending
them without the flux coating cracking and breaking off.
Bending a welding rod can be very useful when welding
around corners or difficult to access areas.
Stainless steel and cast iron welding rods cannot be bent.
The 7018, low hydrogen welding rods are extremely difficult
to use and cannot be bent. The flux breaks off.
This is a standard 5 kg carton of welding rods. Smaller quantities are also available.


We recommend using Oerlikon Overcord Z 6013 welding
rods, or equivalent. These welding rods are called, multipositional welding rods. Good for welding upside down and any position.
They are a little pricey but well worth it, especially when you are learning. We use very good cheaper welding rods for a third of the price but still occassionally use these Oerlikon Overcord Z rods for tiding up and difficult positional welds. Don't buy welding rods or equipment from your local hardware store. Find a welding supply store who know more about welding.
Use 3.2mm welding rods to get yourself started.
Set the amperage to 110 - 115 amps.
Use at least a 6mm, 1/4 inch, or thicker scrap piece of metal
to practice straight inline welding on.

Different diameter welding rods vary in length too.

This next chart is good to know, but once you have
established which rods to use you are set and ready to go.
This chart shows a list of Arc welding rods to choose from.
We recommend starting off with the E-6013. 6013 rods
are really easy to use. Plus, the advantage of bending
them without the flux coating cracking and breaking off.

Bending a welding rod can be very useful when welding
around corners or difficult to access areas.
Stainless steel and cast iron welding rods cannot be bent.
The 7018 welding rods are extremely difficult to use and
cannot be bent. The flux breaks off.

This next chart is very usefull. Knowing where to set your amperage when you get started, can be a little difficult in the beginning. You will soon remember your amperage settings and get the feel for needing more or less amperage without refering to this chart.
It is also useful to know the welding rod packaging, gives you a guideline of the range of amperage settings to work with. This is shown in an earlier photo in this presentation.
Practical to have your welding machine right next to you because you will find the need to constantly change the amperage for different angles and applications.
You will find different makes of welding rods have different characteristics and a different feel to them.
The Oerlikon Overcord Z 6013 welding rods we recommened flow really smoothly and really easy to work with.

Arc welding start-up.
Horizontal straight inline welding.
Clip the welding rod in the holder at a 45 degree angle.

Then get yourself ready to start performing a pull weld.

Photo of Arc welding rod at a 45 degree angle.
Now scrape, or scratch the welding rod tip on the surface of the metal to be welded. As soon as the arc ignites, practice maintaining the arc flow by holding the tip of the welding rod 3 - 6mm (1/8" - 1/4" inch) above the metal surface. Then wait a second or two for the welding puddle to form.
Once you get the flow running smoothly, get the tip of the welding rod really close to the welding puddle. The tip of the welding rod can touch the surface as you weave from side to side. This shows how close the welding rod needs to be to the welding puddle.
When, not if :-) the welding rod sticks, don't try pulling it away. Just twist the rod from left to right to break the welding rod away from the metal surface. You can also try twisting your wrist clockwise or anti-clockwise to break the stuck welding rod away from the surface.
This photo shows what a new welding rod tip looks like.
See how the tip is exposed with the metal rod ready and exposed to make direct contact with the surface to be welded.

This next photo shows the welding rod after stopping the weld process. See the cavity created on the tip of the welding rod where the flux is now cupped around and over the welding metal rod section. This restricts and prevents you from restarting the welding process.

The flux needs to be broken away by tapping and scraping the welding rod tip on the surface of your work piece, breaking the flux coating away to expose the metal rod, in order to make contact with the metal you are welding, to get the arc to strike and restart up again.

Keep practicing this startup process to get used to the feel of it.
Once the arc is flowing and the tip of the welding rod is melting away, carefully maintain the distance and keep yourself as stead as possible. Slowly keep drawing and advancing the welding puddle.
Keep practicing this motion and get yourself used to the feel of the welding process.
Photo showing the clarity of the videos to help describe the liquid 1440 degree C molten metal welding puddle without overexposure to help you understand what to look for while welding. Plus, showing the zig-zag weaving technique.

Zig-Zag Weaving. Straight inline welding
This could be called zig zag or a weaving weld technique.
It would be easier to perform a pull weld when using an Arc welder and better to do a push weld when using a MIG welder. Start off at about a 45 degree angle.
Once you are feeling more confident in maintaining the flow of the arc and controlling it without sticking, start practising the zig-zag, weaving technique. Moving from side to side about 11mm (7/16" inch), concentrating on being as steady as possible with very even and uniform motions. The more steady and uniform your motions are, the neater your welds will end up looking.
We are repeating this description, because we stressing the importance of control.
While'st welding, always keep yourself as steady as possible so as not to sway around. In order to succesfully produce good looking welds, you need to steady yourself by either leaning and placing your leg, or shoulder, arm... or any part of your body against something to steady yourself. Or, alternatively, use your left hand, (if your are right handed), to rest your hand or elbow on the work bench or somewhere and touch your right arm, creating a support to steady your right arm as much as posibble.
We are emphasising the importance of controlling the movements of your welding.
Welding movements need to be very precise and accurate in order to be a very good and successful welder. (Both Arc and MIG, well, any welding for that matter)
The welding movements are very subtle, but accurate and precise, to achieve good results.
We walk you through a single welding video clip, over and over again, to show and point out little subtle movements, which make a substantial difference to your welding results.
After practicing on a scrap piece of material welding straight lines and you have the feel of the welding flow, not moving too fast or too slow in your welding motion. Constantly keeping an eye on the welding puddle.
You need to pull or draw the liquid welding puddle along so as not to create gaps or holes in your weld, as shown and illustrated in our welding videos.
The image shows 2 welding techniques. The zig zag or weaving method and the oval motion technique.
When using the oval motion technique and welding in a straight line, you can move in a closkwise, or anti clockwise motion.

Very important point to follow here:
When welding in an oval motion, advance say 11mm, then go back 6mm (advance 7/16" and back 1/4") This is basically a 2 - 1 ratio movement. You could however make the ovals slightly longer or shorter to suite what you are welding.
Keep the weld about 11mm (7/16") wide, as a starting guideline.
By going back and fourth in the oval motion you are drawing - pulling the welding puddle along. This method works exceptionally well.
The weaving - zig zag works equally as well. Practice both methods and see which one you feel most comfortable with.
It will be good to become proficient in both methods, because we teach you in the advanced welding course where it is better to use one or the other welding techniques in certain applications.
|
 To enhance your user experience on our website, this site uses cookies.
If you continue to browse, you accept the use of cookies on our site.
See our Privacy Policy
for more information.
To enhance your user experience on our website, this site uses cookies.
If you continue to browse, you accept the use of cookies on our site.
See our Privacy Policy
for more information.